Webhooks allow you to receive real-time notifications when important events happen in your IndieStand store. Whether it's a new order, a successful payment, or a cancellation, webhooks enable you to integrate your store with your own systems, automate workflows, and build custom integrations.
This guide explains:
- What webhooks are and how they work
- How to enable webhooks for your store
- Available webhook events and their payloads
- How to add and configure endpoints
- How to test your endpoints
- Verifying webhook signatures for security
- Understanding the retry mechanism
- Troubleshooting common issues
1. What Are Webhooks?
Webhooks are how services notify each other of events. At their core, they are just a POST request to a pre-determined endpoint.
The endpoint can be whatever you want, and you can add them from the IndieStand integrations dashboard. You normally use one endpoint per service, and that endpoint listens to all of the event types.
For example, if you want to receive webhooks from IndieStand, you can structure your URL like: https://www.example.com/indiestand/webhooks/.
How It Works
- An event occurs in your IndieStand store (e.g., a customer places an order)
- IndieStand sends an HTTP POST request to your configured endpoint
- Your endpoint receives the event data and processes it
- Your endpoint responds with a 2xx status code (200-299) to confirm receipt
The way to indicate that a webhook has been processed successfully is by returning a 2xx (status code 200-299) response within a reasonable time-frame (15 seconds).
Important Considerations
- Disable CSRF protection for your webhook endpoint if your framework enables it by default
- Verify the signature and timestamp when processing webhooks (see Signature Verification section)
- Respond quickly - keep processing under 15 seconds to avoid timeouts
- Use HTTPS - webhook endpoints must use HTTPS for security
2. Enabling Webhooks
To start using webhooks with your IndieStand store, you need to install the Svix Webhooks integration.
Step 1: Install the Svix Integration
- Go to App → Integrations
- Find the Svix Webhooks integration card
- Click Install

The integration is free and included with all IndieStand plans.
Step 2: Configure Your Webhooks
After installing the integration:
- Click Configure on the Svix Webhooks card
- You'll be taken to the webhook configuration portal
- Here you can add endpoints, view event logs, and manage your webhook settings
3. Available Events and Event Types
order.created
Triggered when a new order is created in your store, before payment is processed.
Common use cases:
- •Track order creation metrics
- •Send data to analytics platforms
- •Log orders in your own database
Event Payload Schema
typestringenumThe event type
"order.created"order.createdtimestampstringISO 8601 timestamp when the event was emitted
"2024-01-15T10:30:00.000Z"dataobjectOrder data
idstringUnique order identifier
"550e8400-e29b-41d4-a716-446655440003"storeIdstringYour store's unique identifier
"550e8400-e29b-41d4-a716-446655440004"statusstringenumOrder status
"pending"pendingpaidfailedcanceledrefundeddisputedsubtotalnumberOrder amount in cents (e.g., 4999 = $49.99)
"4999"currencystringISO 4217 currency code
"USD"customerobject| nullCustomer information (may be null)
productobjectProduct information
variantobject| nullProduct variant information (may be null if no variant selected)
createdAtstringISO 8601 timestamp when order was created
"2024-01-15T10:30:00Z"updatedAtstringISO 8601 timestamp when order was last updated
"2024-01-15T10:35:00Z"4. Adding an Endpoint
To start receiving webhooks, you need to configure at least one endpoint.
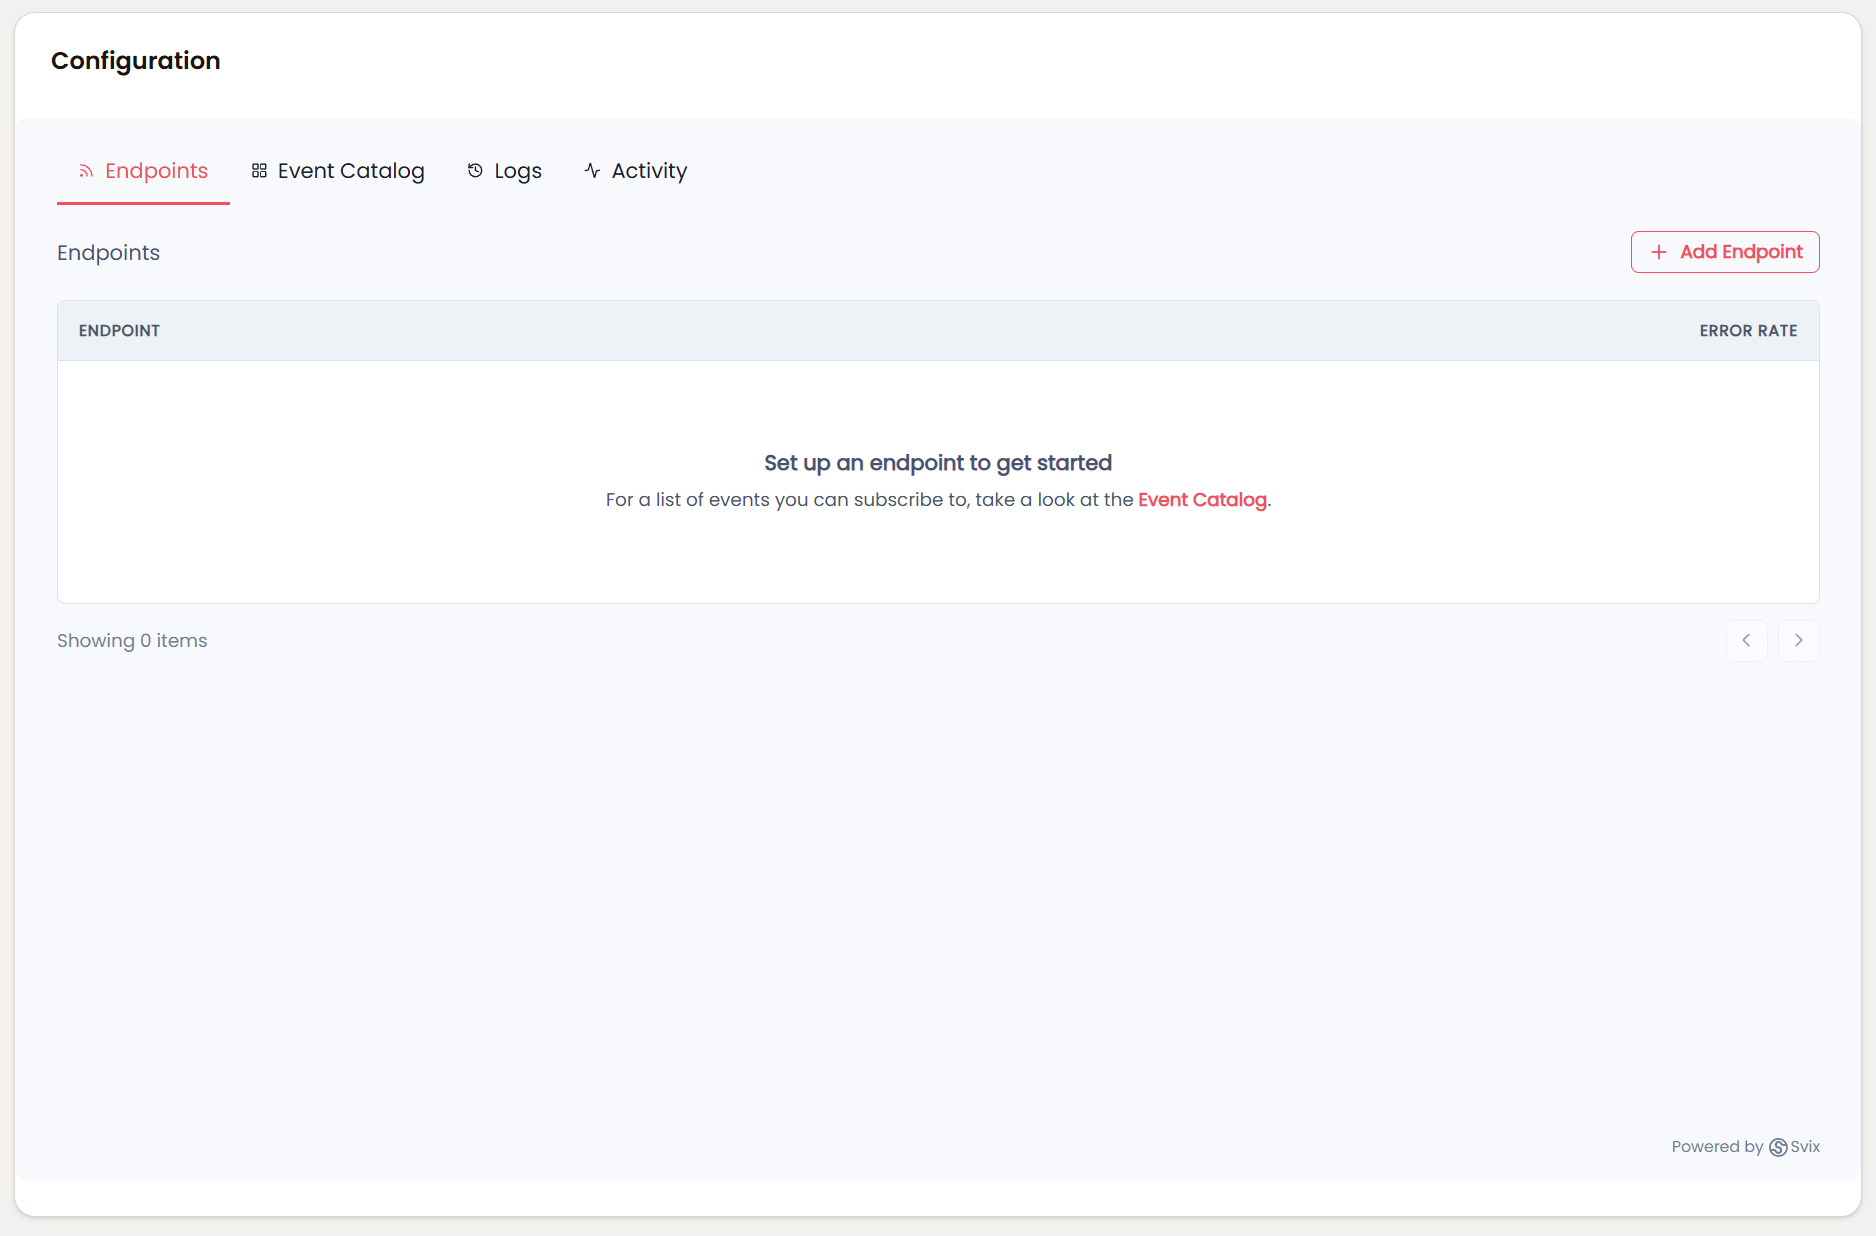
Step 1: Navigate to Endpoints
In the Svix webhook portal, click on the Endpoints tab.
Step 2: Create a New Endpoint
- Click + Add Endpoint or Create Endpoint
- Enter your endpoint URL (must be HTTPS)
- Example:
https://api.yourservice.com/webhooks/indiestand
- Example:
- Select which event types you want to receive (or select all)
- Click Create
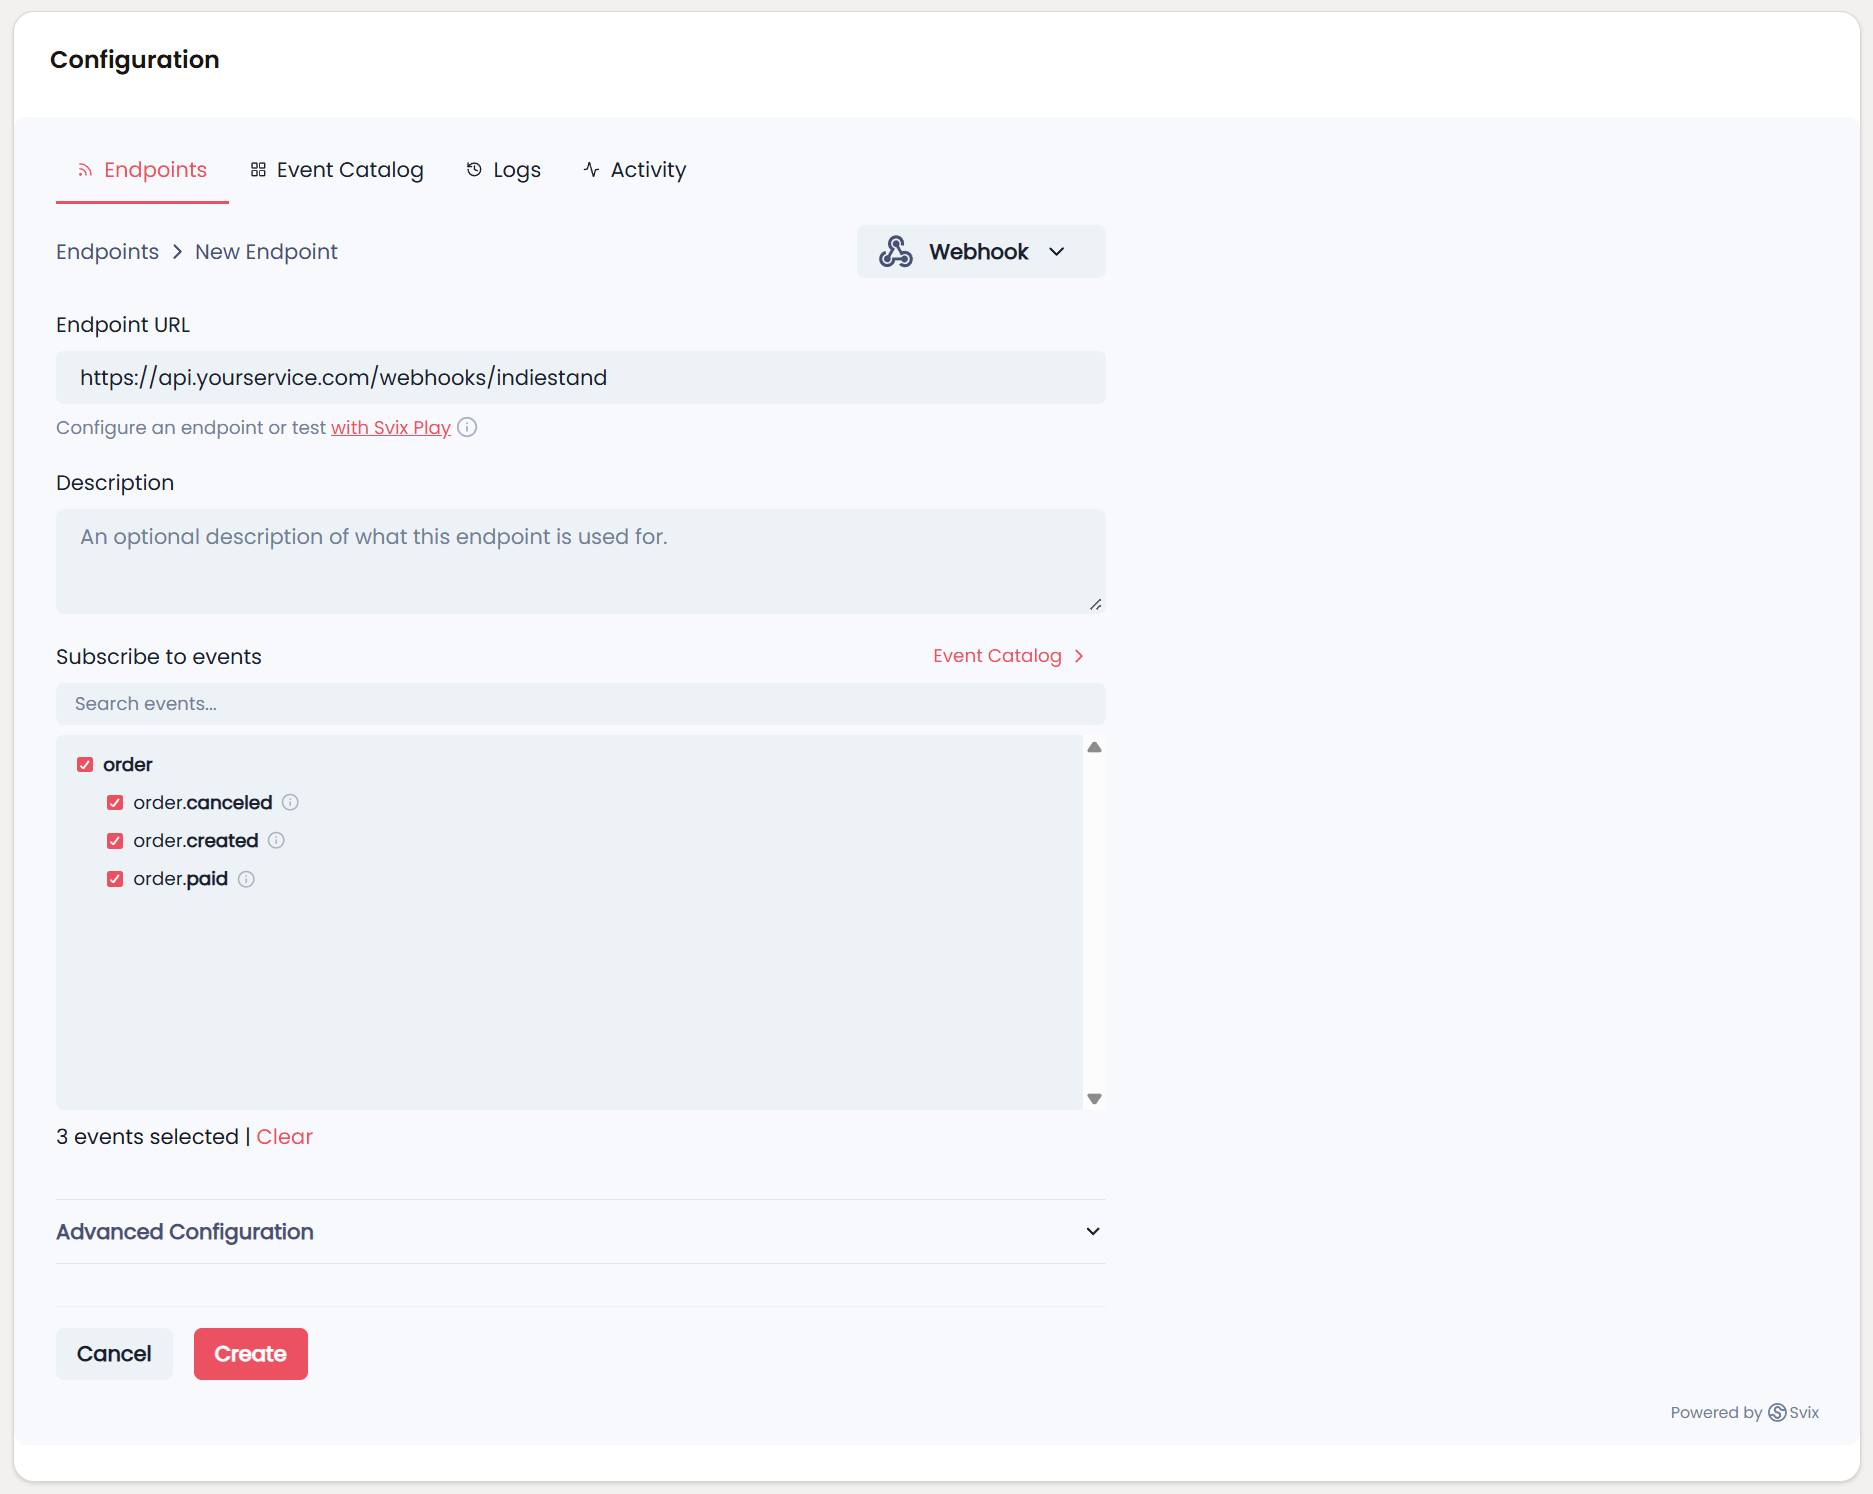
Step 3: Event Type Selection
If you don't specify any event types, your endpoint will receive all events by default. This can be helpful for getting started and testing, but we recommend selecting specific event types to avoid receiving unnecessary messages.
For example, if you only need to know when orders are paid, select only the order.paid event type.
Using Svix Play for Testing
If your endpoint isn't ready yet, click the "Use Svix Play" button to have a unique testing URL generated for you. You'll be able to view and inspect webhooks sent to your Svix Play URL, making it effortless to get started without setting up your own server first.
5. Testing Your Endpoint
Once you've added an endpoint, it's important to test that it's working correctly.
Step 1: Navigate to Testing
- Click on your endpoint in the Endpoints list
- Go to the Testing tab
Step 2: Send a Test Event
- Select the event type you want to test (e.g.,
order.paid) - Click Send Example
- The portal will send a test webhook with example data to your endpoint
Step 3: Review the Results
After sending a test event:
- Click into the message to view the full payload
- See all delivery attempts
- Check whether it succeeded or failed
- View response status codes and headers
- See error messages if delivery failed
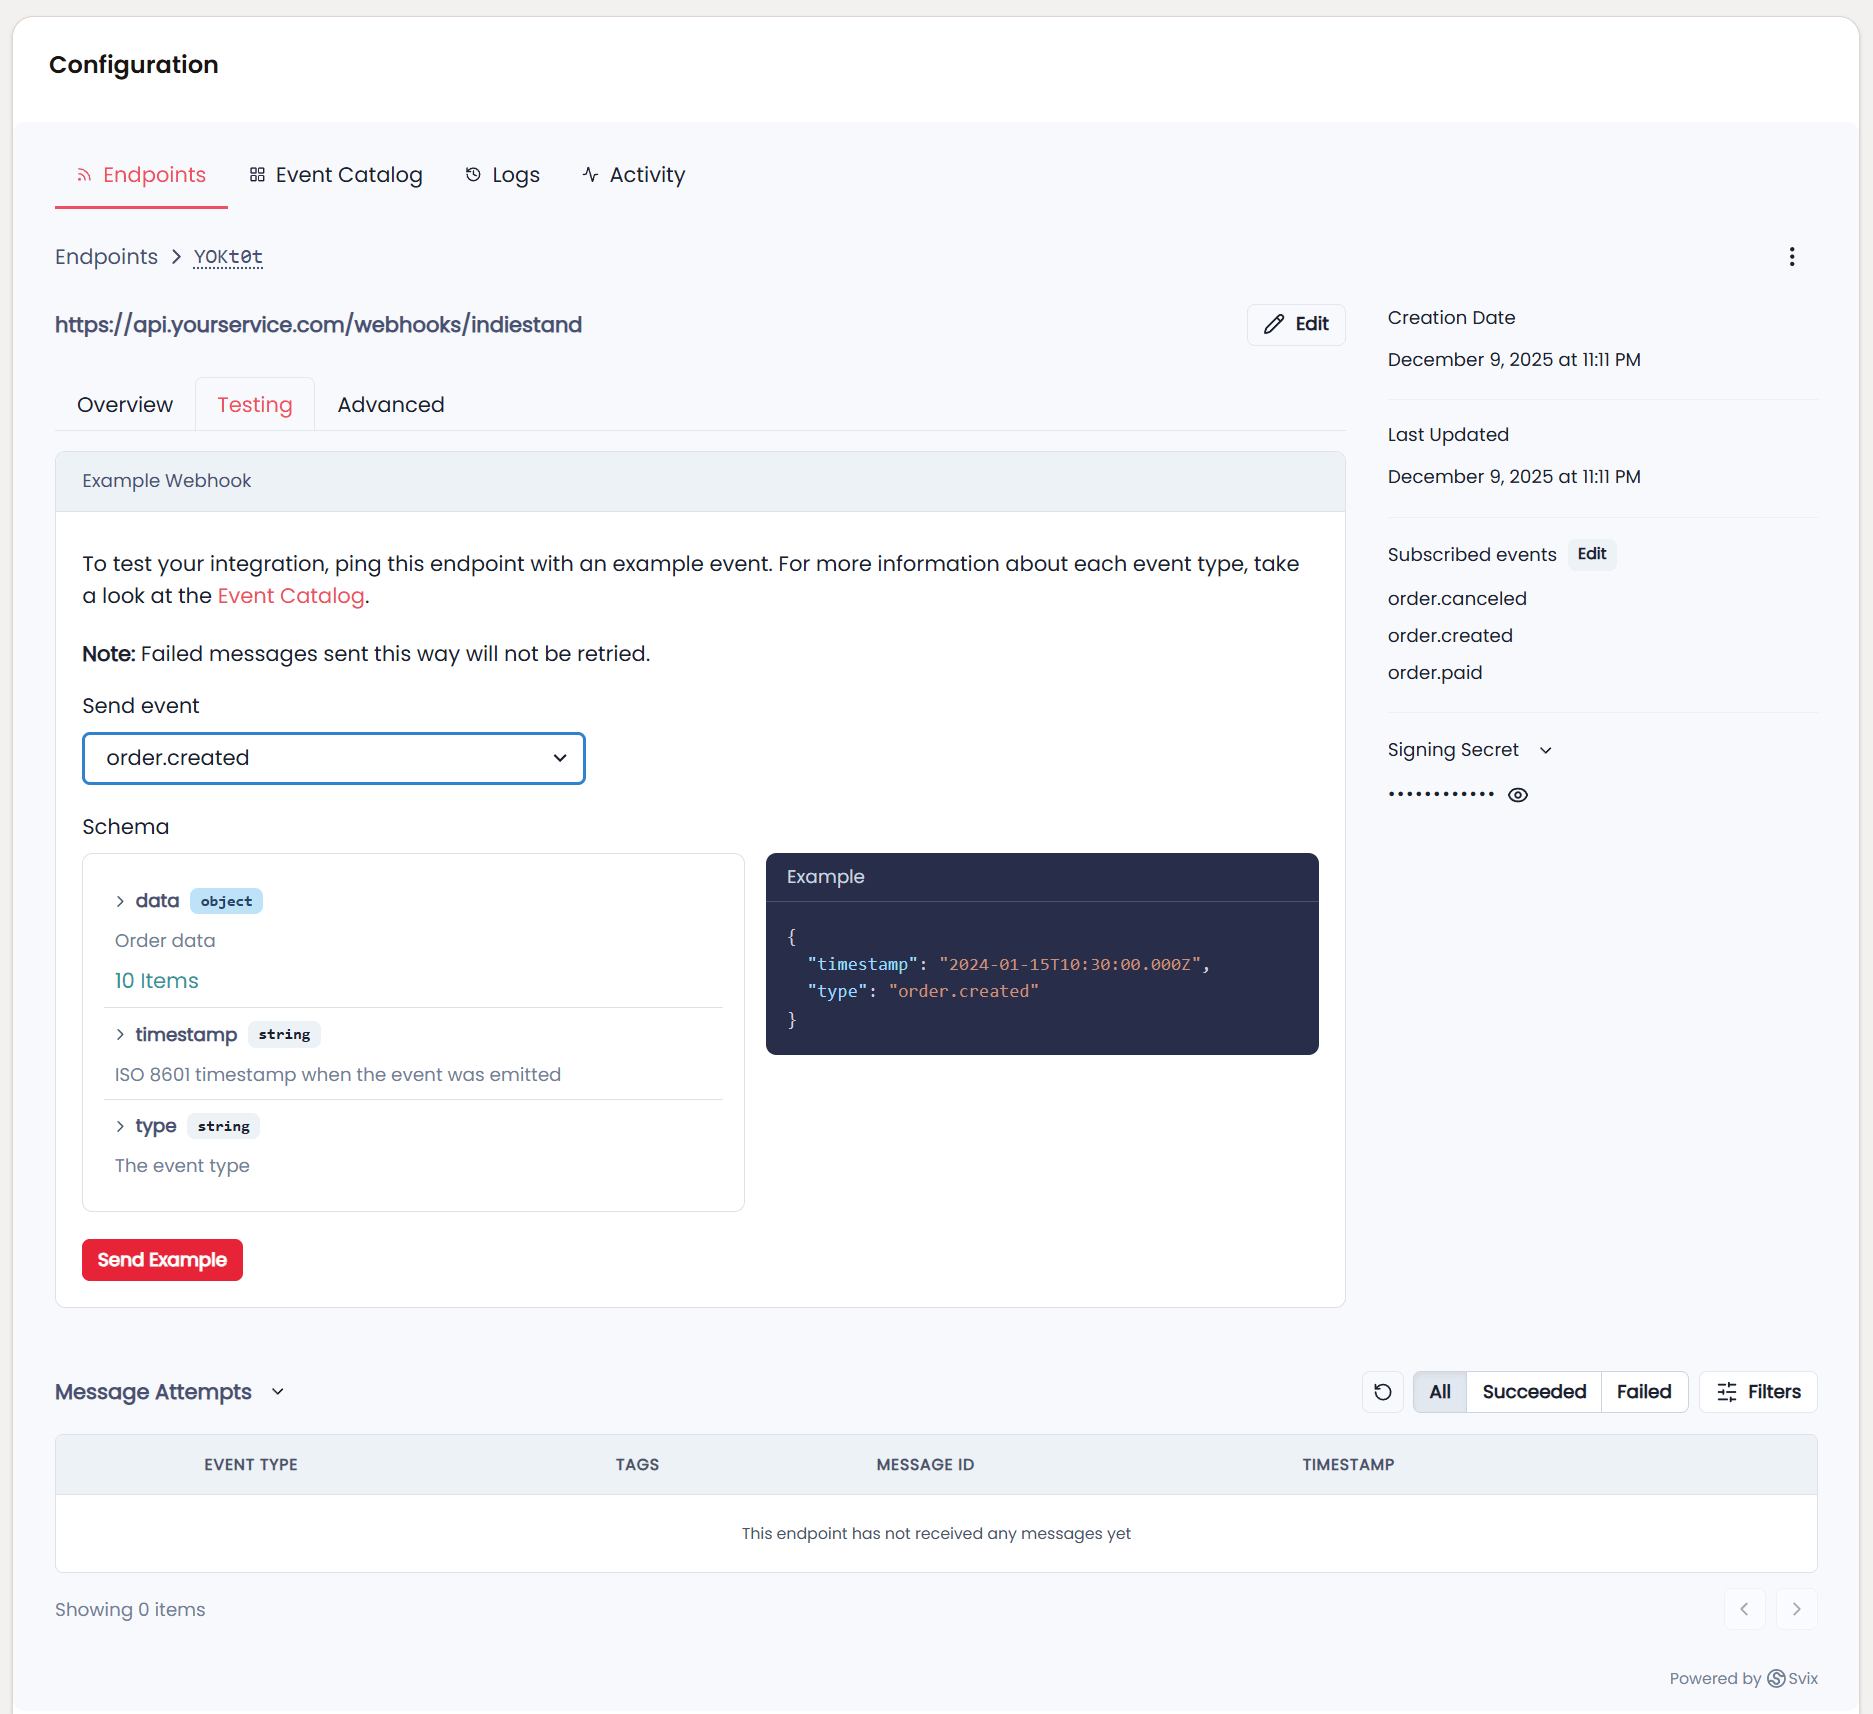
If the test succeeds (returns 2xx status), your endpoint is configured correctly. If it fails, check the error message and your endpoint logs to troubleshoot.
6. Verifying Signatures
Important: Webhook signatures let you verify that webhook messages are actually sent by IndieStand and not a malicious actor. You should always verify signatures in production.
Why Verify Webhooks?
Without verification, anyone could send fake webhook requests to your endpoint, potentially:
- Creating fake orders
- Triggering unauthorized actions
- Accessing sensitive functionality
Signature verification ensures the webhook was genuinely sent by IndieStand.
How to Verify
Svix provides libraries that make verification simple. Here's an example using Node.js/JavaScript:
import { Webhook } from "svix";

// Get your webhook secret from the Svix portal
// (found in the endpoint details page)
const secret = "whsec_MfKQ9r8GKYqrTwjUPD8ILPZIo2LaLaSw";

// These are sent in the webhook request headers
const headers = {
  "svix-id": "msg_p5jXN8AQM9LWM0D4loKWxJek",
  "svix-timestamp": "1614265330",
  "svix-signature": "v1,g0hM9SsE+OTPJTGt/tmIKtSyZlE3uFJELVlNIOLJ1OE=",
};

// The raw request body as a string
const payload = '{"type":"order.paid","timestamp":"2024-01-15T10:30:00.000Z","data":{...}}';

const wh = new Webhook(secret);

try {
  // Throws an error if verification fails
  // Returns the verified payload on success
  const verifiedPayload = wh.verify(payload, headers);

  // Process the webhook
  console.log("Webhook verified:", verifiedPayload);
} catch (err) {
  console.error("Webhook verification failed:", err);
  // Return 400 Bad Request
}
Other Languages
Svix provides official libraries for:
- JavaScript/TypeScript (Node.js)
- Python
- Go
- Ruby
- Java
- Kotlin
- C#/.NET
- Rust
- PHP
- Svelte/React (frontend)
For detailed examples in your language, see the Svix webhook verification documentation.
Important Notes
- Use the raw payload body - Don't parse JSON and re-stringify it, as this can change the signature
- Get the secret from Svix - Each endpoint has a unique signing secret
- Check the timestamp - Svix libraries automatically reject old messages to prevent replay attacks
7. Retry Schedule
If your endpoint is temporarily down or returns an error, IndieStand (via Svix) will automatically retry the webhook based on an exponential backoff schedule.
The Retry Schedule
Each message is attempted based on the following schedule, where each period starts after the preceding attempt fails:
- Immediately - First attempt
- 5 seconds - After first failure
- 5 minutes - After second failure
- 30 minutes - After third failure
- 2 hours - After fourth failure
- 5 hours - After fifth failure
- 10 hours - After sixth failure
- 10 hours - After seventh failure (final attempt)
Example timeline:
An attempt that fails three times before eventually succeeding will be delivered roughly 35 minutes and 5 seconds after the first attempt.
When Retries Stop
- If an endpoint is removed or disabled, delivery attempts will stop
- After all retry attempts are exhausted, the message is marked as permanently failed
- You can view failed messages and manually retry them in the Svix portal
Manual Retries
You can manually retry failed messages at any time:
Single message retry:
- Find the failed message in the portal
- Click the options menu (⋯)
- Click Resend
Bulk recovery:
- Go to the Endpoint details page
- Click Options → Recover Failed Messages
- Choose a time window to recover from
- All failed messages in that period will be retried
8. Best Practices
Respond Quickly
Your endpoint should:
- Receive the webhook
- Store it in a queue or database
- Return a 2xx response immediately
- Process the webhook asynchronously
This prevents timeouts. Don't do heavy processing before responding.
Good:
app.post('/webhooks/indiestand', async (req, res) => {
  // Verify signature first
  const webhook = verifyWebhook(req);

  // Queue for async processing
  await queue.add('process-webhook', webhook);

  // Respond immediately
  res.status(200).json({ received: true });

  // Processing happens later
});
Bad:
app.post('/webhooks/indiestand', async (req, res) => {
  const webhook = verifyWebhook(req);

  // Don't do this - processing might take too long!
  await generateLicenseKey(webhook.data);
  await sendEmail(webhook.data.customer.email);
  await updateCRM(webhook.data);

  res.status(200).json({ received: true });
});
Use Idempotent Processing
Webhooks might be delivered more than once, so make your processing idempotent.
Use the webhook id or order id to track which events you've already processed:
async function processWebhook(webhook) {
  const { type, data } = webhook;

  // Check if we've already processed this order
  const existing = await db.orders.findOne({ id: data.id });
  if (existing?.processed) {
    console.log('Already processed, skipping');
    return;
  }

  // Process the webhook
  if (type === 'order.paid') {
    await grantAccess(data.customer.id, data.product.id);
  }

  // Mark as processed
  await db.orders.update(
    { id: data.id },
    { processed: true }
  );
}
Handle All Event Types
Even if you only subscribe to specific events, handle unexpected event types gracefully:
async function processWebhook(webhook) {
  switch (webhook.type) {
    case 'order.paid':
      await handleOrderPaid(webhook.data);
      break;

    case 'order.canceled':
      await handleOrderCanceled(webhook.data);
      break;

    default:
      console.log('Unknown event type:', webhook.type);
      // Still return 2xx to acknowledge receipt
  }
}
Monitor Your Endpoint
Set up monitoring and alerts for:
- Webhook delivery failures
- Endpoint downtime
- Processing errors
- Queue backlogs
The Svix portal provides detailed logs and metrics, but you should also monitor your own systems.
9. Troubleshooting
Common Issues
"Endpoint is failing" or continuous retries
Possible causes:
-
Not using the raw payload body
- When verifying signatures, you must use the exact raw string body
- Don't parse JSON and re-stringify it - this changes the signature
- Most frameworks provide a way to get the raw body
-
Wrong secret key
- Each endpoint has a unique signing secret
- Make sure you're using the correct secret for the endpoint
- Find it in the endpoint details page in the Svix portal
-
Incorrect response codes
- Return 2xx (200-299) for success
- Return 4xx or 5xx for failures you want retried
- Don't return 2xx if processing actually failed
-
Endpoint timing out
- Your endpoint must respond within 15 seconds
- If processing takes longer, queue the work and respond immediately
- Process webhooks asynchronously
-
HTTPS certificate issues
- Webhook endpoints must use valid HTTPS certificates
- Self-signed certificates won't work
- Use Let's Encrypt for free certificates
Endpoint was disabled
If all attempts to deliver messages fail for 5 consecutive days, the endpoint will be automatically disabled to prevent infinite retries.
To re-enable:
- Go to the Svix portal
- Find your endpoint
- Click Enable Endpoint
- Fix the underlying issue first!
Missing webhooks
Check these items:
- Is the endpoint enabled? - Disabled endpoints don't receive webhooks
- Are you subscribed to the event type? - Check your endpoint's event subscriptions
- Did the event actually occur? - Verify in your IndieStand orders dashboard
- Check the Svix portal logs - See if the webhook was sent but failed
Debugging Tips
- Use Svix Play - Test your integration with the Svix Play URL first
- Check the logs - The Svix portal shows detailed logs for every webhook
- Test with curl - Send a test request to your endpoint manually
- Verify locally - Use tools like ngrok to test your local development server
- Check your server logs - Look for errors in your application logs
Getting Help
If you're stuck:
- Check the Svix documentation for detailed guides
- Review examples in the Svix GitHub repo
- Contact IndieStand support at support@indiestand.com
10. Example Integration Use Cases
Send Custom Emails
async function handleOrderPaid(orderData) {
  await sendEmail({
    to: orderData.customer.email,
    subject: `Thank you for your purchase!`,
    body: `
      Hi ${orderData.customer.fullName},

      Thank you for purchasing ${orderData.product.title}!
      Your download links and license key are attached.

      Order ID: ${orderData.id}
    `
  });
}
Generate License Keys
async function handleOrderPaid(orderData) {
  const licenseKey = await generateLicenseKey({
    productId: orderData.product.id,
    customerId: orderData.customer.id,
    orderId: orderData.id
  });

  await saveLicenseKey(licenseKey);
  await emailLicenseKey(orderData.customer.email, licenseKey);
}
Sync with Your Database
async function handleOrderCreated(orderData) {
  await db.orders.create({
    id: orderData.id,
    email: orderData.customer.email,
    productId: orderData.product.id,
    amount: orderData.subtotal,
    currency: orderData.currency,
    status: orderData.status,
    createdAt: new Date(orderData.createdAt)
  });
}
Update Your CRM
async function handleOrderPaid(orderData) {
  if (!orderData.customer) return;

  await crm.upsertContact({
    email: orderData.customer.email,
    name: orderData.customer.fullName,
    tags: ['customer', 'paid'],
    customFields: {
      lastPurchase: orderData.product.title,
      lastPurchaseDate: orderData.createdAt,
      totalSpent: orderData.subtotal
    }
  });
}
11. Security Checklist
Before going to production, ensure you:
- ✅ Always verify webhook signatures
- ✅ Use HTTPS for your endpoint
- ✅ Disable CSRF protection for the webhook route
- ✅ Validate the payload structure
- ✅ Handle errors gracefully
- ✅ Process webhooks idempotently
- ✅ Respond within 15 seconds
- ✅ Log webhook receipt for debugging
- ✅ Monitor for failures
- ✅ Test thoroughly with test events
12. Next Steps
Now that you understand webhooks:
- Install the Svix integration at App → Integrations
- Add your first endpoint in the Svix portal
- Send test events to verify your endpoint works
- Implement signature verification for security
- Deploy to production and start receiving real webhooks
- Monitor and maintain your webhook integration
Happy webhook building! If you have any questions, don't hesitate to reach out to our support team.